Pan Seared Salmon Recipe: 7 Easy Steps for Crispy, Juicy Salmon
Table of Contents
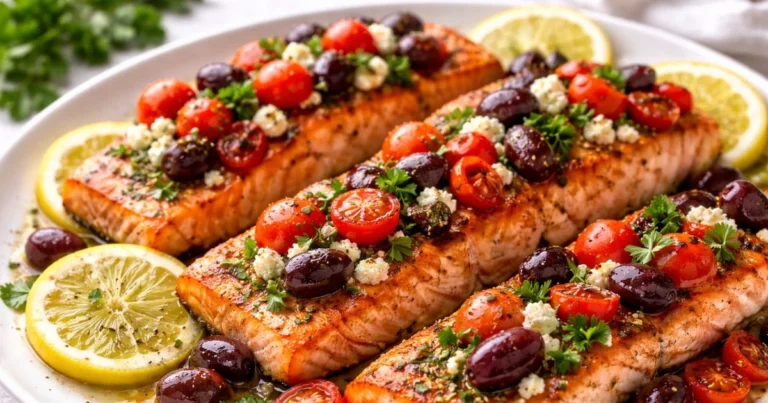
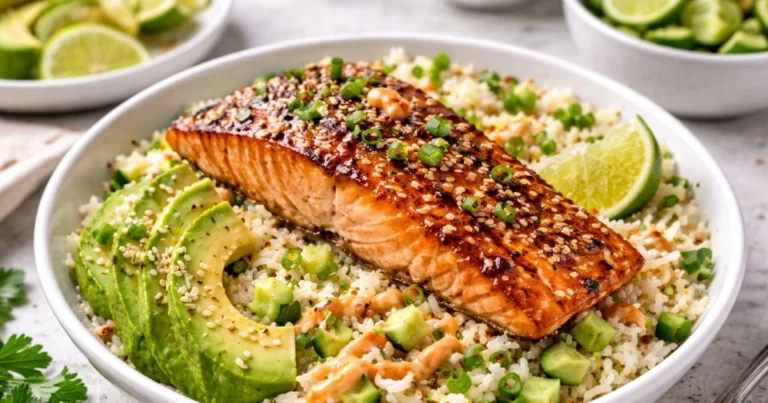
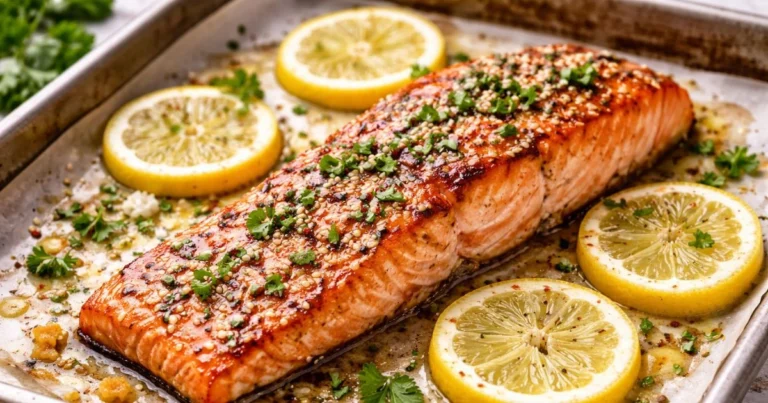
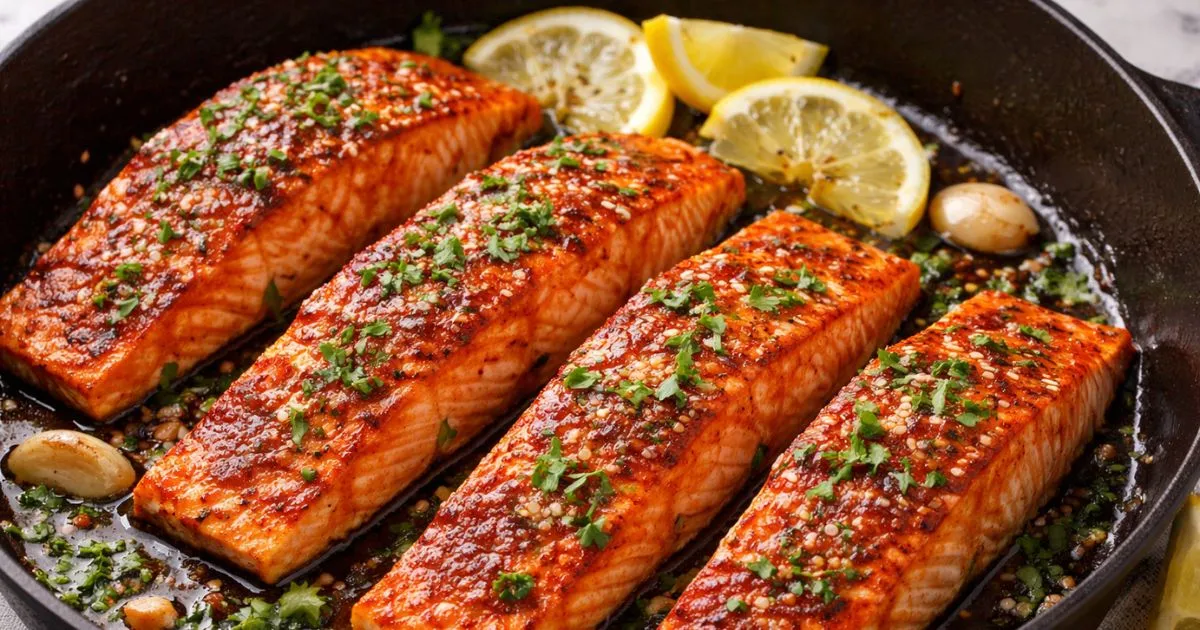
Pan seared salmon recipe lovers will appreciate how quick and flavorful this dish is. This pan seared salmon recipe delivers crispy skin, a juicy interior, and restaurant-quality results using a simple skillet method you can master in under 20 minutes.
You deserve a weeknight dinner that feels special without hours in the kitchen. This method is fast, reliable, and built for busy cooks who want a restaurant-quality result in about 15–20 minutes.
Follow seven clear steps—drying, seasoning, heating the pan, searing, flipping, finishing, and a quick rest—and you’ll get a golden crust and a tender, flaky interior every time.
The short upgrade: a garlic lemon butter sauce that brightens the dish without adding fuss. You’ll learn timing for a typical 6-ounce fillet and simple adjustments for thicker cuts.
Key rule to remember: don’t move the fish while it sears. That single step makes the difference between a ragged surface and a crisp, even crust.

Key Takeaways
- Start with dry, well-seasoned fillets for the best crust.
- Use a hot skillet and don’t disturb the fish while it sears.
- Plan about 15–20 minutes total; adjust by thickness.
- The garlic lemon butter sauce is a quick, weeknight-friendly upgrade.
- This guide covers selection, timing, doneness, tips, and sides.
Pan seared salmon recipe that delivers crispy skin and a juicy center
A hot skillet and a dry surface are the two tricks that transform a simple fillet into a crispy, flavorful meal.
Why this method works for a fast, easy salmon dinner
High direct heat creates Maillard browning, so the exterior forms a sturdy crust while the interior stays tender. This method is ideal when you want big texture payoff with minimal fuss.
Dry the fish, season simply, and use enough oil so the fish releases cleanly. The “hot pan + dry surface” principle drives browning and a better crust every time.
What you’ll learn about how to pan sear salmon at home
- Selecting the right fillets and patting them dry.
- Seasoning basics and timing by ounces so you avoid overcooking.
- How to manage heat, when to flip, and tips to prevent sticking.
- A quick sauce option and side ideas to finish the meal.
In most cases the fish itself needs under 10 minutes of active cooking time—just a few focused minutes per side. This approach makes an easy salmon dinner you can repeat on busy weeknights.
What Is Pan Seared Salmon?
A hot skillet gives you a quick, flavorful crust and a moist center with minimal fuss.
How quick contact heat builds a crust and keeps the fish moist
In plain terms, pan searing means high-heat contact cooking that browns the surface fast. That quick browning makes a golden crust that adds crisp texture and deeper flavor.
The crust is simply the caramelized outer layer. It boosts taste by concentrating savory notes from the Maillard reaction while creating a pleasant contrast to the tender flesh inside.
“A short, intense sear locks juices so the interior stays moist without long exposure to heat.”
Skillet vs. oven: pick the method that fits your time and texture
Use a skillet when you want speed and a crisp exterior. The direct heat gives immediate browning and a restaurant-style crust.
Choose the oven for hands-off batch cooking or when you prefer a gentler finish. Baking is better for even doneness across many fillets.
- Skillet: fast, crust-first, ideal for single servings.
- Oven: steady heat, hands-off, good for larger batches.
Rendered fat from skin-on fillets helps with texture and reduces sticking. The cut, thickness, and presence of skin matter next — they change timing and technique for the best result in your salmon recipe.
Choosing Salmon Fillets for Salmon With Crispy Skin
Buying the right cut makes crispy skin and even cooking easy. Pick fillets that are similar in size so they finish together. Aim for center-cut pieces about 1 inch thick for steady heat and a predictable cook time.
Skin-on vs. skinless
Skin-on or skinless: which to buy
For crisp skin and easier flipping, choose skin-on fillets. The skin holds the flesh together and renders fat as it cooks, which helps release and brown the surface.
Best thickness and cut
Choose center-cut fillets rather than thin tail pieces. Even thickness cooks more predictably. A 6-ounce, 1-inch-thick portion is a common US dinner size and gives a reliable crust without overcooking the interior.
How to spot fresh fillets and prep pin bones
Fresh fish should smell clean and ocean-like, not fishy. Flesh must be firm, moist but not slimy, and have vibrant color.
- Ask your fishmonger to remove pin bones, or check by running your finger along the flesh.
- Pull any bones with clean tweezers; they come out easily when you grip close to the skin.
- Plan about 6 ounces per person for a balanced protein serving.
Ingredients You’ll Need for Pan Seared Salmon
Keep the ingredient list short so the fish’s natural flavor shines through.
Base ingredients
Simple is best: a fresh 6-oz salmon fillet, kosher salt, freshly ground black pepper, and a high-heat oil. These four items give you a crisp exterior and a tender center.
Oil choices
Use avocado oil or light olive oil (about 1 tablespoon). Both tolerate high heat and help browning without smoking early.
Optional serving boosts
Add lemon wedges and chopped parsley for brightness and color. Serve them on the side so you can drizzle fresh lemon as you like.
Quick lemon garlic butter sauce
Keep these on hand: 2 tablespoons butter, 1 clove garlic (minced), 1 tablespoon lemon juice, and 2 tablespoons low-sodium chicken broth. The broth stretches the sauce, lemon adds acidity, butter gives richness, and garlic adds depth. If your lemons are extra tart, stir in 1 teaspoon honey to balance.
| Item | Amount (US) | Purpose |
|---|---|---|
| Salmon fillet | 6 oz | Main protein |
| Kosher salt & pepper | To taste (about 1/2 teaspoon salt) | Seasoning for crust and flavor |
| Avocado or olive oil | 1 Tbsp | High-heat fat for browning |
| Butter, garlic, lemon juice, broth | 2 Tbsp butter, 1 clove, 1 Tbsp lemon juice, 2 Tbsp broth | Quick sauce for finishing |
You can serve the fillet plain if you’re short on time, or spoon the lemon garlic butter over the top for a glossy finish. Either way, these accessible ingredients get you a reliable, flavorful meal.
Kitchen Tools That Make Pan Searing Easier
A few simple tools cut mistakes and help you get a crisp exterior every time.
Best pan to use: cast iron vs. nonstick skillet
What you want from cookware is steady heat, enough surface area, and a surface that releases the fillet cleanly.
Cast iron holds heat well and builds a better crust. A well-seasoned skillet will brown evenly and tolerate high temperatures.
Nonstick gives easy release and is forgiving for beginners. It is a good choice if you worry about sticking or prefer less oil.
Why a thin spatula helps you flip salmon cleanly
Use a thin or fish spatula. It slides under the fillet without tearing and lets you flip salmon with confidence.
Instant-read thermometer for perfect doneness
An instant-read thermometer removes guesswork. Check internal temperature to avoid overcooking and to nail your preferred doneness.
| Tool | Why it helps | Beginner friendly? |
|---|---|---|
| Cast iron skillet | High heat retention, better crust | Yes, once seasoned |
| Nonstick skillet | Easy release, less oil required | Very |
| Thin/fish spatula | Slides under fish for clean flips | Yes |
| Instant-read thermometer | Consistent doneness without guesswork | Essential |
Quick setup tip: have a plate ready for the fillet and a towel to handle hot handles. You can succeed without specialty gear, but these small tools reduce mistakes and speed up your cooking.
Prep Steps for Crispy Pan Seared Salmon
Quick, precise prep makes the biggest difference in texture. These steps take just a few minutes but deliver crisp skin and a moist interior every time.
Bring fish to even temperature
Let the fillets sit at room temperature for about 10–20 minutes so they cook evenly. This reduces the risk of a cold center and shortens total cooking time.
Dry the surface thoroughly
Pat salmon dry on both sides with dry paper towels. Remove all surface moisture—wet skin will steam instead of crisping.
Season simply
Sprinkle kosher salt to taste and finish with freshly ground black pepper. Kosher salt is easier to control and gives a clean, even seasoning.
Choose and apply oil
Use avocado oil or light olive oil for high-heat searing. Lightly coat the pan or brush a thin layer on the fish so it browns without sticking.
- Pull fillets 10–20 minutes before cooking (even temp).
- Dab both sides with paper towels until the surface is dry.
- Season generously with salt and freshly ground black pepper.
- Keep the skin dry so it crisps; use a small amount of oil to prevent sticking.

Note: Prep only takes a few minutes but has an outsized impact on texture—follow these steps and you’ll notice the difference in every bite.
Step-by-Step: How to Pan Sear Salmon in a Skillet
Start by heating your skillet until the oil shimmers — that tiny cue prevents tearing and improves browning. Use medium-high heat so the fish releases cleanly and the surface forms a crust fast.
Heat the skillet properly so the salmon releases cleanly
Preheat the skillet until oil ripples. A drop of water should dance briefly. When the oil shimmers, you’re ready to add the fillets.
Sear the first side undisturbed to build a golden crust
Place the fillet flesh-side down first to get a focused crust. Do not move it. Let it cook for about 4–6 minutes for a typical 6-ounce piece.
When to flip salmon and how to prevent breaking
Use a thin fish spatula and flip confidently in one motion. If the fish sticks, wait 60–90 seconds — it will release when the crust is set. For thinner fillets subtract a minute; for thicker add a minute or two.
Finish cooking skin-side down for salmon with crispy skin
After flipping, cook another 2–4 minutes skin side down to crisp and finish through. Look for color change up the sides, gentle resistance, and opaque edges as cues for doneness.
“If it sticks, it likely needs one more minute — forcing it will tear the flesh.”
Garlic Lemon Butter Sauce for Pan Seared Salmon
A quick garlic-lemon butter finish adds bright, glossy flavor without adding fuss. This sauce uses pantry staples and takes about 5 minutes from start to plate. It’s optional but makes the dish feel like a restaurant meal.
How to concentrate the base:
- Melt 1 teaspoon butter in a small skillet and sauté 1 clove minced garlic for 1–2 minutes until fragrant.
- Add 1/4 cup low-sodium chicken broth and 1 tablespoon lemon juice. Simmer until reduced by half — about 3 minutes — for a concentrated flavor.
Emulsify for a glossy finish: Remove the pan from heat or drop to very low. Whisk in cold butter pieces a few at a time until the sauce turns silky, not greasy.
Balance and plating: If the lemon juice feels sharp, stir in 1/2 teaspoon honey to round the taste. Drizzle the warm sauce over the fillet, sprinkle chopped parsley, and add lemon slices or wedges.
“A quick reduction and a cold butter whisk create a glossy, restaurant-style finish.”
This sauce also works as a finishing side for rice or vegetables, tying the whole plate together.
How to Tell When Pan Seared Salmon Is Done
Doneness is easier to judge when you know the temperature targets and a few simple visual cues.
Use a thermometer if you can. For safety, the USDA recommends 145°F measured at the thickest part. At that temp the flesh is firmer and fully opaque.
Many cooks prefer 135°F for medium, which keeps the center moister and more tender. Expect a few degrees of carryover cooking after you remove the fillet, so pull it from heat slightly early if you aim for medium.

Quick checks and the fork-flake test
If you lack a thermometer, use the fork test. Press into the muscle along the natural lines and gently twist.
- Easy flaking along the lines and slightly translucent center = medium.
- Opaque, firm flakes that separate cleanly = well-done (145°F).
“Salmon is a high-protein fish; overcooking mainly changes texture rather than safety.”
Probe at the thickest point near the center and check in the final minutes of cooking. Serve immediately for best juiciness and texture.
Tips for Restaurant-Quality Pan Seared Salmon Every Time
Mastering release and heat control removes the guesswork from each cook. Follow a few clear habits and you’ll get a crisp crust and even doneness more often.
Don’t move the fish while it builds a crust
Leave the fillet alone for the first full side. Moving it breaks the surface and spoils the crust. Trust the timing and let the contact heat do its work.
If it sticks, it needs more time
Use the release rule: if the fish clings to the skillet, wait 60–90 seconds. It will lift cleanly once the crust sets. Forcing a flip tears the flesh.
Why skin-on helps the fillet hold together
Skin acts like a shield and keeps delicate flesh intact. It renders fat and protects the top while you finish skin-side down for a crisp finish.
Oil vs. butter for searing
Use high-smoke-point oil for initial sear at high heat. Add butter near the end for flavor and gloss. That balance keeps fat from burning while boosting taste.
Adjusting for thickness and finishing tips
- Thin ends: reduce first-side time by 1 minute to avoid drying.
- Thicker fillets: add 1–2 minutes and lower heat slightly to cook through.
- Season simply with salt pepper before cooking and taste the sauce before adding more.
“Spoon off excess rendered fat if it pools, but don’t pour it away in mid-sear — it helps flavor and crisp the skin.”
What to Serve With Pan Seared Salmon for an Easy Salmon Dinner
Choose sides that cook in the same short window so everything arrives hot and plated together. For the easiest weeknight approach, pick one starch, one vegetable, and a bright finishing touch.
Default plate for busy nights: steamed white or brown rice and tender steamed asparagus make a complete, low-effort side pairing. Both take roughly the same minutes as the fillet and require minimal attention.
Quick veggie swaps that match skillet timing: roast Brussels sprouts, toss green beans in the oven, or sauté spinach with garlic. These options fit easily into weeknight rhythms and add variety.
If you want comfort food, serve garlic mashed potatoes for a heartier plate. Add a simple salad with mixed greens, cherry tomatoes, and a lemon wedge when you want freshness with minimal cooking.
“Finishing the plate with lemon wedges brightens richer sauces and ties the flavors together.”
| Side | Why it works | Approx. cook minutes |
|---|---|---|
| Rice + steamed asparagus | Neutral starch with crisp green—fast and filling | 15–20 minutes |
| Roasted Brussels sprouts | Crisp, caramelized veg that pairs with richer butter sauces | 20–25 minutes |
| Sautéed spinach or green beans | Quick, bright greens that finish in the skillet time | 5–8 minutes |
| Garlic mashed potatoes + simple salad | Comforting starch with a fresh counterpoint | 20–25 minutes |
Time-management tip: start any 20–25 minute sides first, then begin quick veg and the main so everything finishes within the same minutes. Always offer lemon wedges for brightness—especially with richer sauces.
Conclusion
, Keep the routine short and focused—dry, heat, sear, flip, and check temperature—and you’ll win the night.
Recap in a line: dry the fish, heat the pan until the oil shimmers, sear undisturbed, flip when the fillet releases, and finish to temperature. This method reliably creates a flavorful crust with a moist center.
This approach is faster than it looks—most cooks finish in about 15–20 minutes. Repeat the base method and vary finishing flavors like lemon, herbs, or the quick butter sauce to keep meals interesting.
One easy next step: use an instant-read thermometer and buy similar-sized fillets for consistent results. Once you nail the sear, you can make seared salmon that tastes restaurant-worthy at home.
FAQ
What’s the quickest way to get a crisp skin without overcooking the flesh?
Pat fillets dry with paper towels, season lightly with salt and freshly ground black pepper, and preheat a heavy skillet over medium-high heat with a high-smoke-point oil like avocado or canola. Place skin-side down and press gently for 10–15 seconds to prevent curling. Sear undisturbed until the skin releases and is deeply golden, then flip and finish briefly flesh-side down or in the oven if needed.
How long should you cook a 6-ounce fillet to reach medium doneness?
For a 6-ounce fillet about 1-inch thick, cook roughly 4–6 minutes skin-side down, then 2–4 minutes after flipping. Use an instant-read thermometer to target 135°F for medium or 145°F if you prefer fully cooked fish.
Do you need to remove the skin before cooking?
No. Leaving the skin on helps the fillet hold together and yields the crispiest texture. If you prefer skinless, remove it before seasoning, but expect the flesh to be more delicate when flipping.
Can you use butter to sear, or will it burn?
Butter adds flavor but has a lower smoke point. Use a neutral oil with a higher smoke point to sear, then finish with a knob of butter, garlic, and lemon juice for a glossy sauce and nutty flavor without burning.
What’s the best way to season fillets for simple flavor?
Keep it minimal: kosher salt and freshly ground black pepper just before cooking. Add a squeeze of lemon juice or a sprinkle of fresh herbs after cooking to brighten the taste without masking the fish.
How do you prevent the fish from sticking to the skillet?
Ensure the pan and oil are properly preheated: the fish should sizzle on contact. Don’t move the fillet while searing; wait for a natural release. Use a thin fish spatula to lift and flip cleanly.
Is it okay to use frozen fillets?
Yes—thaw completely in the refrigerator, then bring to room temperature and pat dry with paper towels. Excess moisture causes steaming instead of a crust, so drying is critical.
How do you make a quick lemon garlic butter sauce to serve with the fish?
Sauté minced garlic in a bit of butter, add a splash of broth and lemon juice, reduce to concentrate flavor, then whisk in cold butter off the heat for a glossy finish. Season to taste and drizzle over the fillets.
What internal temperature should you target for safety and best texture?
The USDA recommends 145°F, which yields fully cooked fish. Many chefs prefer 135°F for a moist, slightly translucent center. Use an instant-read thermometer near the thickest part to check.
Can you finish thicker fillets in the oven after searing?
Yes. Sear skin-side down until golden, then transfer to a preheated 400°F oven for a few minutes until the internal temperature reaches your target. This prevents over-browning while ensuring even doneness.
What sides pair best for an easy, balanced dinner?
Keep it simple: steamed asparagus, roasted Brussels sprouts, garlic mashed potatoes, or a crisp green salad with lemon vinaigrette complement the rich, flaky flesh and buttery sauce.
Any tips for prepping fillets quickly?
Remove pin bones with fish tweezers, pat dry with paper towels, season just before cooking, and let the fillets rest at room temperature for 10–15 minutes for even cooking.