Homemade Chicken Broth Recipe: 6 Reasons It Tastes Better Than Store-Bought
Table of Contents
Homemade Chicken Broth Recipe: 6 Reasons It Tastes Better Than Store-Bought
This guide explains how to make chicken broth at home using simple ingredients and proven cooking techniques to get the best flavor.
This chicken broth recipe is an easy homemade chicken broth recipe that works perfectly for soups, sauces, and healthy meals.
You’ll learn how to make this chicken broth recipe and why it’s better than store-bought. Homemade broth has fewer additives and more natural flavor. It’s a healthier and tastier choice for your meals.
This article shows you how to make chicken broth at home. You’ll need a whole chicken or bones, onion, garlic, celery, and carrot. We’ll guide you through stovetop, slow cooker, and Instant Pot methods. You’ll also get a simple recipe for U.S. home cooks.
Expect tips on choosing ingredients, saving money, and storing your broth. We’ll compare it to store-bought options and offer advice for better flavor. Your soups, gravies, and meals will taste richer and cleaner.
Key Takeaways
- this chicken broth recipe delivers richer, more natural flavor than many store brands.
- You control ingredients and sodium, making it a healthier option.
- Recipes include quick stovetop and hands-off Instant Pot or slow cooker methods.
- Using bones and roasting aromatics boosts depth and body.
- Proper cooling, storage, and freezing keep broth safe and convenient.
Why this chicken broth recipe tastes better than store-bought broth
This chicken broth recipe relies on gentle simmering, high-quality ingredients, and well-balanced seasoning to create a deeper, cleaner flavor.
From the very first sip, the difference is clear. Making chicken broth at home gives you full control over every step, resulting in a brighter and more refined taste than most store-bought options.
Control over ingredients and sodium
You choose what goes into your broth and how much salt to use. Brands like Knorr, Swanson, and College Inn often add more sodium and preservatives. Making your own broth lets you avoid these additives and tailor the sodium to your diet.
Freshness and absence of preservatives
Using fresh bones, meat, and veggies gives your broth a clearer flavor. Store-bought broths sit on shelves for months. Homemade broth, on the other hand, is always fresh and free from preservatives like sodium benzoate.
Customizable flavor profile
You can adjust the herbs, aromatics, and umami boosters to fit your taste. Add thyme, parsley, or bay leaf for a unique flavor. For deeper umami, try mushrooms or a bit of soy sauce. You can also adjust the simmer time to suit your needs.
| Aspect | Homemade chicken broth | Common store-bought brands |
|---|---|---|
| Ingredient transparency | You control every ingredient and can list them precisely. | Often use flavor enhancers and longer ingredient lists. |
| Sodium control | Easily adjusted for dietary needs and labeled as low-sodium. | Typically higher sodium to extend taste and shelf life. |
| Freshness | Made from fresh bones, meat, and produce for brighter aroma. | May lack brightness due to time on shelves and preservatives. |
| Customization | Herbs, aromatics, and umami additions tailored to recipes. | Standardized flavor profile aimed at broad appeal. |
| Preservatives | No preservatives when you make it at home. | Often contain stabilizers and preservatives for shelf stability. |
| Use cases | Flexible: light broths for poaching, rich bases for sauces. | Convenient for quick cooking, less depth for complex dishes. |
How to make chicken broth at home: ingredients you’ll need
To make a rich, clear broth, you need a few fresh ingredients and pantry staples. Start by gathering chicken, bones, vegetables, herbs, and seasonings. A good list of ingredients is key for any chicken broth recipe.
Essential ingredients: chicken, bones, and aromatics
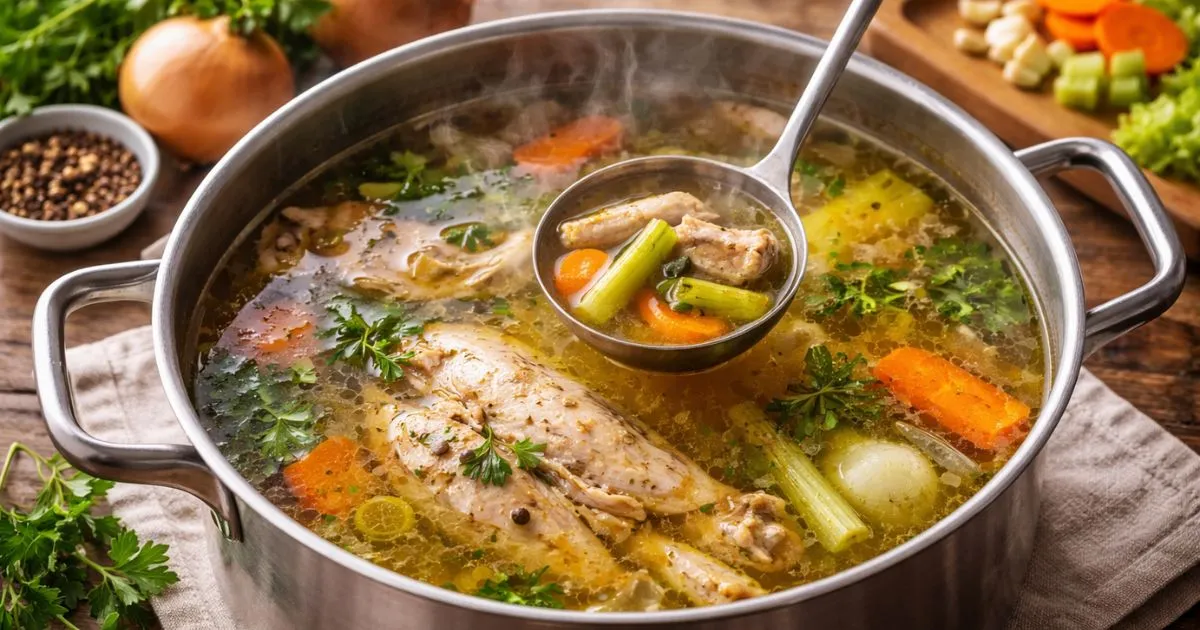
Begin with a whole raw chicken (3–4 lb) or 2–4 lb of carcasses and bones. Fill your pot with cold water to get the best flavor and collagen. Add 1–2 large onions, 2–3 carrots, and 2–3 celery stalks, all roughly chopped.
Include 3–4 garlic cloves, a handful of fresh parsley, 2–3 bay leaves, and 8–10 whole black peppercorns. Wait to add salt until the end to control sodium levels.
Optional additions for extra depth
For deeper umami, add mushroom stems or dried shiitake. Leek greens add a sweet touch. Parsnip brings subtle complexity. A spoon of tomato paste or a roasted tomato adds brown, savory notes.
For an Asian twist, a slice of fresh ginger brightens the broth. Use 1–2 tablespoons of apple cider or white vinegar to draw minerals and collagen from bones.
Ingredient quality tips and shopping suggestions
Opt for organic or pasture-raised chicken for cleaner flavor and fewer antibiotics. Save bones from roasted chickens for future batches. Choose bones with cartilage and marrow — backs, necks, and feet boost body and collagen in your broth.
Shop at farmers’ markets, Whole Foods, Trader Joe’s, or a local butcher for fresher cuts and better bones. Freeze scraps until you’re ready to make broth. Buying well and storing wisely makes homemade chicken broth easier and tastier.
| Ingredient | Quantity | Purpose |
|---|---|---|
| Whole chicken or bones | 3–4 lb or 2–4 lb bones | Primary flavor, protein, collagen |
| Cold water | Enough to cover | Base for extraction and simmering |
| Onion | 1–2 large, quartered | Sweetness and aromatic depth |
| Carrots | 2–3, chopped | Natural sweetness, color |
| Celery | 2–3 stalks, chopped | Herbal backbone and balance |
| Garlic | 3–4 cloves | Warm savory notes |
| Parsley | Small bunch | Fresh herbal lift |
| Bay leaves | 2–3 | Earthy, rounded aroma |
| Black peppercorns | 8–10 whole | Subtle heat and complexity |
| Optional: shiitake, leek greens, parsnip, tomato paste, ginger, vinegar | As desired | Enhance umami, sweetness, acidity, or regional character |
Step-by-step chicken broth recipe method
Begin with a clean workspace and a big pot. This guide shows you how to make chicken broth at home. Follow these steps for a tasty broth, whether you’re making a quick batch or simmering it for hours.
Preparing the chicken and bones
How to make chicken broth starts with properly preparing the chicken and bones. When learning how to make chicken broth, remove excess skin to keep the broth lighter and cleaner. If the bones are large, break them or ask your butcher to cut them, as this helps extract more flavor when you make chicken broth.
To enhance the taste, many cooks recommend roasting the bones before starting. Roasting the bones at 425°F for 20–30 minutes is a proven technique when mastering how to make chicken broth, as it adds depth and richness to the final broth without changing the cooking process.
Building flavor with vegetables and herbs
Knowing how to make chicken broth correctly helps you balance vegetables, herbs, and simmering time for a clean and flavorful broth.
Put bones and chicken in a pot and cover with cold water. Add garlic, onion, carrot, and celery. Also, toss in parsley, bay leaves, and peppercorns.
Slowly bring the water to a simmer. This helps impurities rise. Keep vegetables big to avoid cloudiness and get more flavor.
Simmering times and skim tips
Once simmering, lower the heat to avoid boiling. Skim off foam and impurities with a fine mesh skimmer in the first 30–60 minutes.
Simmering time varies: stovetop 2–6 hours for clear broth; 12–24 hours for richer broth. Slow cooker takes 8–12 hours. Instant Pot is 45–90 minutes. Keep the water barely bubbling.
Straining and finishing the broth
Pour the broth through a fine-mesh sieve with cheesecloth to remove solids. Cool it a bit, then refrigerate. This lets fat solidify on top for easy removal.
Taste and season with salt and pepper near the end. For a concentrated broth, reduce it on the stove. Save cooked meat for soups or salads.
Simple chicken broth recipe for busy cooks
If you’re looking for a quick and tasty chicken broth, this recipe is perfect. It’s great for weeknight soups or rice. You can use a rotisserie chicken or leftover bones for the fastest option. This way, you save time and still get a delicious homemade broth.
Quick stovetop shortcut
Start by placing shredded rotisserie chicken or pre-cooked bones in a big pot. Add 8–10 cups of cold water, a halved onion, two carrots, two celery stalks, some parsley, a bay leaf, and 8–10 peppercorns. Heat it gently, then lower the heat and simmer for 30–60 minutes. Strain and season it to taste. This recipe is ideal for when you need broth right away.
One-pot weeknight method
For a quicker method, brown a 3–4 lb whole chicken or bone-in thighs in the pot with some oil. Then, add onion, carrots, celery, and cover with water. Simmer for 60–90 minutes while you prepare the rest of your meal. Remove the chicken, strain the liquid, and save the broth. You’ll get about 8–10 cups from a whole bird or carcass. This method is fast and gives a richer broth without extra effort.
Quick methods make a lighter broth, perfect for everyday soups. Longer simmering makes a thicker broth, great for a fuller taste. Choose what fits your schedule and meal plans.
Stovetop method for the best homemade chicken broth
Using the stovetop lets you control the broth’s quality. Start with cold water and quality bones in a big pot. This way, you can easily skim off any foam and avoid spills.
This method helps you get clear broth with rich flavor. It’s perfect for soups and sauces.
Choosing the right pot and heat control
Choose a heavy-bottomed pot or a Dutch oven. The bigger size keeps everything covered and prevents spills. Heat it on low to medium-low to avoid boiling too fast.
Start with cold water and bones. As it heats up, remove the gray foam with a skimmer or spoon. Keep it simmering gently to keep it clear and prevent fat from mixing in.
How long to simmer for clarity and flavor
Simmer time varies based on your needs. For clear broth, simmer for 2–6 hours. This is great for soups and sauces.
For a richer broth, simmer for 8–12 hours. Use more bones and simmer longer to get a gelatinous stock.
Avoid boiling too hard. It can make the broth cloudy. Check it often, skim off foam, and add hot water if needed.
Reducing and concentrating flavor
After straining, boil the broth down to concentrate the flavor. Reduce it by 25–50 percent. This makes it perfect for risottos, sauces, and freezing.
Remember, reducing broth increases salt and acidity. Taste it and adjust as needed. Store it in the fridge or freezer for later use.
Slow cooker and Instant Pot methods for hands-off broth
Want rich, homemade broth with little effort? Try slow cookers or pressure cookers. They let you walk away while the broth cooks. Your choice impacts timing, texture, and skimming needs.
Slow cooker timing and settings
For a classic flavor, use a 6–8 quart slow cooker on low for 8–12 hours. Add chicken, bones, onion, carrot, celery, bay leaf, peppercorns, and cold water. The slow heat extracts gelatin and flavor, making it smooth.
Need it faster? Use high for 4–6 hours. Skimming is minimal because the simmer is gentle. You can skim off fat with a spoon or chill and remove solidified fat.
Instant Pot pressure cooking times and tips
For deep flavor quickly, choose the Instant Pot. For a meaty broth, cook a whole chicken on high pressure for about 45 minutes. For a bone-rich broth, cook for 60–90 minutes.
Add 1–2 tablespoons of apple cider vinegar before cooking. It helps extract minerals from bones. Let the pot release pressure naturally for 15–20 minutes to clear the broth.
Comparing flavor outcomes to stovetop
Slow cooker broth is softer and sweeter due to gentle heat. It feels rounder in your mouth.
Instant Pot broth can match long simmer collagen extraction but may be denser. It’s fast and reliable with the right timing.
Any method works for your easy chicken broth recipe. Slow cooker for a hands-off, mellow broth or Instant Pot for quick results. Stovetop gives the clearest broth with frequent skimming.
Chicken broth vs chicken stock: what’s the difference
Many people think broth and stock are the same. But knowing the difference is key for soups, sauces, and braises. This guide explains the definitions, how bones and simmer time affect the outcome, and when to use each.
Definitions and common uses
Broth is a light, seasoned liquid made by simmering meat with bones. You can drink it or use it in clear soups. Stock, on the other hand, is mostly bones and is simmered longer to extract collagen. It’s often unseasoned or lightly seasoned, making it versatile for many recipes.
How bones and simmer time change results
The bones used and their amount impact the texture. Backs, necks, and feet add more collagen. Longer simmer times, like six to twenty-four hours, turn collagen into gelatin. This makes the stock thick when chilled, adding body to sauces.
Broth, made with more meat and shorter simmer times, is cleaner and more flavorful. It stays pourable even when cool.
When to use broth or stock in recipes
Use broth for a quick soup or light sauce. Stock is better for gravies, braises, risotto, or pan sauces that need gelatin. You can also reduce stock to concentrate its flavor, making it a rich glaze.
| Attribute | Chicken Broth | Chicken Stock |
|---|---|---|
| Main components | Meat, some bones, aromatics | Primarily bones, some meat scraps, aromatics |
| Simmer time | 1–4 hours | 6–24 hours |
| Typical seasoning | Seasoned and ready to eat | Lightly seasoned or unsalted for flexibility |
| Texture when chilled | Stays liquid | Jelly-like from gelatin |
| Best uses | Clear soups, sipping, light sauces | Gravies, braises, risotto, concentrated reductions |
| Recipe examples | Simple chicken broth recipe for soups and sipping | Classic chicken stock recipe for sauces and braising |
Tips for richer flavor: bones, roasting, and aromatics
Before you start, plan your stock carefully. Roasting, choosing the right bones and meat, and adding herbs at the right time are key. These steps can turn a simple broth into a flavorful dish you’ll remember.
Roasting bones and vegetables first
Roast bones and veggies at 400–450°F for 20–40 minutes. This makes them brown and adds flavor. But watch them closely to avoid burning, as burnt bits can make the broth bitter.
Using a mix of bones and meat for body
Use a mix of meaty parts and bones rich in marrow. Chicken feet and joints add collagen for a silky texture. This mix gives flavor and body without too much fat.
Herb and spice combinations that elevate broth
Start with a classic mix of parsley, thyme, and bay leaf. Add peppercorns and garlic for warmth. For different flavors, try ginger and scallion, rosemary with lemon, or star anise with soy or fish sauce.
Use strong herbs like thyme and bay early to infuse flavor. Add fresh herbs later to keep their bright taste. These tips help make your chicken broth rich and full of flavor.
Healthy chicken broth: nutritional benefits and considerations
Making your own stock lets you see exactly what’s in your broth. A simple chicken broth recipe makes a warm, hydrating liquid. It’s great for light diets and recovery. You can adjust the ingredients, flavor, and sodium to fit your needs.
Collagen, minerals, and protein content
Simmering bones and connective tissue releases collagen and gelatin. These add body and may help with joint comfort and gut health. The broth also has small amounts of protein and minerals like potassium and magnesium.
If you add vinegar while simmering, more minerals like calcium and phosphorus are released.
Sodium control and dietary adjustments
Store-bought broths often have more sodium than expected. Making your own broth lets you control the salt. You can follow DASH or heart-healthy guidelines by using no-salt or low-salt methods.
You can also make the broth paleo, Whole30-compliant, or keto-friendly. Just skip starchy additions and keep herbs and aromatics simple.
Allergy and label considerations compared to store brands
Commercial broths may have additives or hidden allergens like soy, dairy, or yeast. Brands like Pacific Foods and Imagine have different sodium and ingredient levels. Making your own broth avoids surprises and lets you exclude gluten, added sugar, or MSG.
| Attribute | Homemade chicken broth | Typical store brand |
|---|---|---|
| Control over sodium | You set the salt level for dietary plans | Often higher; many varieties are high-sodium |
| Collagen and gelatin | Present when bones and connective tissue are used | May be reduced if made from meat-only concentrates |
| Additives and allergens | Free from unwanted ingredients you exclude | May contain soy, yeast extract, or dairy derivatives |
| Customization | Easy to tailor with herbs, vinegar, or extra vegetables | Limited to available flavors and formulations |
| Use in diets | Works for paleo, keto, Whole30, and low-sodium plans | Some options fit special diets; check labels closely |
Storage, cooling, and freezing instructions
After simmering a pot of homemade broth, cool it quickly to keep taste and safety. Use an ice bath under the pot or divide the liquid into shallow containers. This helps heat escape faster. Try to cool the broth and put it in the fridge within two hours of cooking.
Proper cooling and refrigerator storage times
Put cooled containers in the fridge on a middle shelf. This keeps the temperature steady. Store broth in airtight containers to prevent odors and moisture loss. Use refrigerated broth within three to four days for the best taste.
If fat solidifies on top, you can skim it away before reheating. This makes the broth clearer and lowers calories while keeping the flavor.
Freezing tips and portioning the broth
Freezing chicken broth preserves flavor and makes it convenient. Use labeled, freezer-safe containers or mason jars, leaving space for liquid expansion. Silicone ice-cube trays are great for small amounts like tablespoons or single-cup cubes.
Think about how you cook. Freeze 1-cup portions for sauces and 4-cup portions for soups. Broth stays best for three to six months. But, it can last up to twelve months if sealed well.
Thawing and reheating safely
Thaw frozen broth overnight in the fridge for the safest thawing. If you need it faster, use the microwave defrost setting or thaw in cold water, changing the water every 30 minutes.
Reheat thawed broth until it simmers to ensure safety. Once thawed, use the broth within one to two days. Avoid refreezing it more than once.
Whether you’re storing for a short time or freezing for months, these steps keep your broth tasting fresh. This way, your homemade chicken broth is always ready when you need it.
| Task | Method | Time/Notes |
|---|---|---|
| Rapid cooling | Ice bath or shallow containers | Cool and refrigerate within 2 hours |
| Refrigerator storage | Airtight containers | Use within 3–4 days; remove solidified fat if desired |
| Freezing | Freezer-safe containers, mason jars (leave headspace), or ice-cube trays | 1-cup and 4-cup portions useful; best quality 3–6 months |
| Thawing | Refrigerator overnight, microwave defrost, or cold-water bath | Reheat to a full simmer; use within 1–2 days after thawing |
Common mistakes to avoid when making homemade chicken broth
Small errors can greatly affect this chicken broth recipe. Keep this guide handy to avoid cloudy liquid, dull flavor, and spoiled stock. These tips work for both simple and slow-simmered recipes.
Over-boiling and cloudiness
Agitating the broth too much can mix fat and proteins into the liquid. This makes it cloudy and greasy. Start with cold water and gently simmer the pot.
Chop vegetables into larger pieces to prevent excess starch and bits. Skim the gray foam early, in the first 20–30 minutes. Then, keep the simmer low and steady to avoid cloudiness.
Under-seasoning and when to add salt
Timing is key when adding salt. Too much early on can make the broth too salty. Taste as you go, but adjust the seasoning at the end.
Start with a light pinch of salt, check mid-cook, and season fully at the end. Under-seasoning can make the broth taste flat. Add salt and a splash of vinegar or lemon juice to enhance the flavor.
Poor storage practices and spoilage signs
Cooling and storing broth safely is crucial. Cool it quickly by placing the pot in an ice bath or dividing it into shallow containers. Never leave broth at room temperature for more than two hours.
Transfer it to airtight containers and refrigerate within two hours. Use it in the fridge for four days or freeze it in portions for longer storage. Watch for signs of spoilage like a sour smell, slimy texture, or mold. Proper storage keeps your broth fresh and safe.
If you want consistent results, this chicken broth recipe can be made ahead and stored for weekly cooking.
Once you understand how to make chicken broth, you can use it in soups, sauces, and meal prep for richer homemade dishes.
Conclusion
Making homemade chicken broth lets you control the flavor and ingredients. You can choose the best chicken broth recipe or a simple one for busy nights. This way, you decide what goes into your broth.
There are several ways to make chicken broth. You can use the stovetop for a slow, deep flavor. Or, try the slow cooker for easy simmering. If you’re in a hurry, the Instant Pot is a quick option.
Want to make chicken broth at home? Follow the step-by-step guide and use roasted bones or vegetables for extra flavor. This will make your broth taste amazing.
Store your homemade chicken broth to use in soups, sauces, and more. Save bones from rotisserie chickens and freeze them. This will help you save money and make delicious broth every time.
FAQ
What’s the difference between chicken broth and chicken stock?
Broth is lighter, made from meat and bones, simmered briefly, and seasoned. You can drink it or use it in soups. Stock, on the other hand, is mostly bones, simmered longer to extract collagen. It’s often neutral, perfect for sauces, gravies, or reductions.
How do I make an easy chicken broth at home with minimal effort?
Start with a rotisserie chicken or saved carcass. Add 8–10 cups cold water, a quartered onion, two carrots, two celery stalks, parsley, a bay leaf, and peppercorns. Simmer 30–60 minutes for a flavorful broth ready to use the same day.
What ingredients do I need for the best homemade chicken broth recipe?
You’ll need a whole chicken (3–4 lb) or 2–4 lb bones, cold water, and 1–2 large onions. Also, 2–3 carrots, 2–3 celery stalks, 3–4 garlic cloves, parsley, 2–3 bay leaves, and 8–10 peppercorns. Add kosher salt to taste later. Optional ingredients like mushroom stems, tomato paste, ginger, or apple cider vinegar enhance flavor and collagen extraction.
How long should I simmer chicken broth for good flavor and clarity?
Simmer for 2–6 hours for a clear, flavorful broth. For a gelatinous, collagen-rich stock, simmer 8–12 hours. Keep the simmer gentle and skim impurities in the first 30–60 minutes for the clearest broth.
Can I make rich chicken broth in a slow cooker or Instant Pot?
Yes. Slow cookers work well on low for 8–12 hours or high for 4–6 hours. Instant Pot pressure-cooks in 45–90 minutes. This method is quicker and gives great flavor with less effort than stovetop simmering.
Should I roast bones and vegetables before simmering?
Roasting bones and vegetable halves at 400–450°F for 20–40 minutes adds Maillard richness. It makes the broth darker and more savory. But, avoid over-roasting to prevent bitterness.
How do I keep my broth from being cloudy?
Start with cold water and simmer gently. Skim scum during the first hour. Avoid over-chopping vegetables and don’t agitate the pot. Strain through a fine-mesh sieve or cheesecloth for clarity.
When should I add salt and other seasonings?
Start with little or no salt. Salt concentrates as the broth reduces. Taste and season after straining and any reduction. Add fresh herbs toward the end for brightness, and hardy aromatics and spices early for depth.
How do I store, cool, and freeze homemade chicken broth safely?
Cool quickly by placing the pot in an ice bath or dividing into shallow containers. Refrigerate within two hours and use within 3–4 days. Freeze in labeled containers or ice-cube trays for small portions. Broth keeps best for 3–6 months frozen; inside 12 months is still safe though flavor declines.
What’s the best way to portion broth for future use?
Freeze in convenient portions: 1-cup containers for sauces and single recipes, 4-cup containers for soups, and ice-cube trays for small amounts. Label containers with date and contents so you can thaw only what you need.
Are there health benefits to making homemade chicken broth?
Homemade broth can supply collagen, gelatin, electrolytes, and small amounts of minerals. It’s hydrating, customizable for low-sodium or special diets, and free from unwanted additives or flavor enhancers found in some commercial brands.
How can I increase collagen and body in my broth?
Use bones with cartilage and marrow—necks, backs, joints, and chicken feet are excellent. Add a tablespoon or two of apple cider or white vinegar to cold water to help extract minerals and collagen. Longer, low-temperature simmering (8–12 hours) pulls more gelatin into the liquid.
What common mistakes should I avoid when making chicken broth?
Avoid rolling boils that emulsify fat and cloud the broth, don’t over-chop vegetables, and don’t salt early if you might reduce the broth. Cool and store properly—don’t leave broth at room temperature more than two hours. Discard any broth with off smells, slime, or visible mold.
Can I make a quick weeknight chicken broth that still tastes good?
Yes. Brown a few bone-in chicken pieces in a pot for extra flavor, add aromatics and water, and simmer 60–90 minutes while you prepare the rest of your meal. This one-pot weeknight method balances speed and depth and typically yields 8–10 cups from a 3–4 lb chicken.
How does homemade broth compare to store-bought brands like Swanson or Pacific Foods?
Homemade broth gives you control over sodium, avoids preservatives and hidden additives (MSG, yeast extracts), and often tastes fresher and brighter. Commercial brands offer convenience and consistency, but they may contain higher sodium and flavor enhancers. Making your own is cost-effective and more sustainable if you reuse bones and reduce packaging waste.
Can I use vegetable scraps and other additions to boost flavor?
Yes. Save onion skins, carrot peels, leek greens, mushroom stems, and herb stems in a freezer bag to build flavor. Optional additions like tomato paste, dried shiitake, ginger, or a splash of soy or fish sauce (sparingly) add umami and regional character to the broth.
How do I concentrate broth for sauces or risotto?
After straining, simmer the broth uncovered to reduce its volume by 25–50% to concentrate flavor. Reduce slowly and taste as you go, because reduction increases sodium. Use the concentrated broth as a base for pan sauces, risottos, or glaze reductions.